Suspenders are both practical and decorative. We had idea to do a little tutorial to show you the manufacture of suspenders in our way: simple and fast.

The material:
- 2 rectangles of stars fabric
7x75 cm for 2 to 4 years child,
7x85 cm for 6 to 8 years,
7x90 cm for 10 to 14 years,
9x110 cm for 16 years to adult.
- sewing thread matching the fabric
- 4 25 mm suspenders clasps for child,
36 mm
for adult.
- 2 adjustment clips 25mm (child) or 36mm (adult)
- 1 suspenders cross-brace 25mm (child) or 36mm (adult)
- 2 black or white elastic band 2cm wide x 15cm
Tools:
- loop turner (indispensable)
- cisors
- sewing machine, of course!
We made a video just for you to show each step in picture (you can activate the English subtitles by clicking on CC):
To help you achieving, we added the tutorial, with step by step photos:
1 / Iron each cut strip of fabric

2 / Fold each strip of fabric right side against right and stitch to 1cm from the edge then Iron the strips seam very flat before returning it.

3 / Once the strips returned with the loop turner iron it the seam centered.

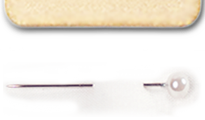
4 / Slip in each of the suspenders on the future front part the adjustment buckles, fold the fabric twice and stitch.

5 / Now slip in each of the suspenders, the suspender clips, then move the strip in hand in the adjustment buckle by ensuring the buckle and the clamp are on the same side. Tighten the adjustment buckle on the strip.

6 / Slip each strip crossing them in the cross-brace.

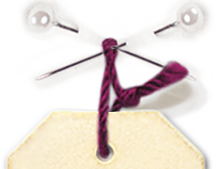
7 / Push each of the elastic bands in the back part of each strip with the loop turner (pass through the seam) up to 30 cm in height, secure it with a pin and stitch.


8 / Place in each of suspenders, the back clamps, fold the fabric twice and stitch.

Well done! It's over, you just have to give your custom suspenders or pair them with the kids outfits. Why not strapless floral fabrics to give a chic and cheerful side to a man's outfit?
Find all our printed patterned fabrics on this page to give you some suspenders creation ideas!